|
Wait!!! Maybe I should test it before glueing it!
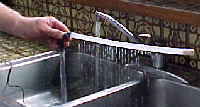
I filled the sink with water and submersed the pump. Success!!! The water has an even flow...just like I planned!
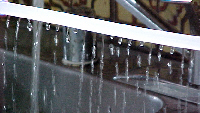
The holes are very small (about 1/8 inch).
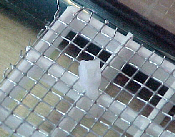
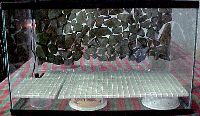
I attached the egg crate to the screen with plastic strip ties.
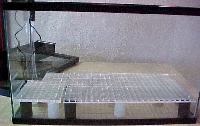
I placed everything in the tank to make sure everything would fit properly.
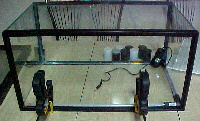
In this picture you can see that the tube is very close to the top edge of the tank.
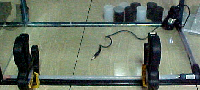
Then I started glueing the parts in. The glue is a silicone glue combination. Clamps are used to hold the tube into place
while the glue is drying.
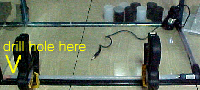
After I had glued the tube in place I remembered that there was an air bubble that made the water back up in the tube so I
drilled a small hole in the end of the tube, opposite the other holes.
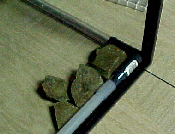
OK...Now it's time to start landscaping. First things first though...I glued some rocks to the back of the tank. This will
be the rock wall where the water will fall from.
Starting from the top just under the tube with the holes in it I began glueing rocks.
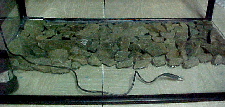
I continued on down the glass until there were enough rocks to cover the part that would show. Not knowing what sort of water
flow I will end up with makes this that "box of chocolates" thing... right? All you need to be sure of is to position
the top row of rocks so that they don't block the holes.
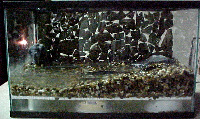
Here you see how the finished wall will look. I can also start placing larger rocks in the bottom to see where they might
look best.
Humm...wonder what those things are under the screen? They happen to be chip dip containers, flipped over with holes for air
escape. Also, some spray paint caps. They are all 2" in height. So, you will need to eat plenty of chips and dip before
starting the project! Seriously though, just about anything will work for the spacing...your choice.
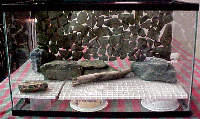
Above is a close up of the wall... I will put dark aquarium plastic on the back to fill the holes. I considered putting glue
between the spaces and adding gravel also.
Below is where I am adding gravel and beginning the Landscape. I have
about 3 gallons of water.
|